
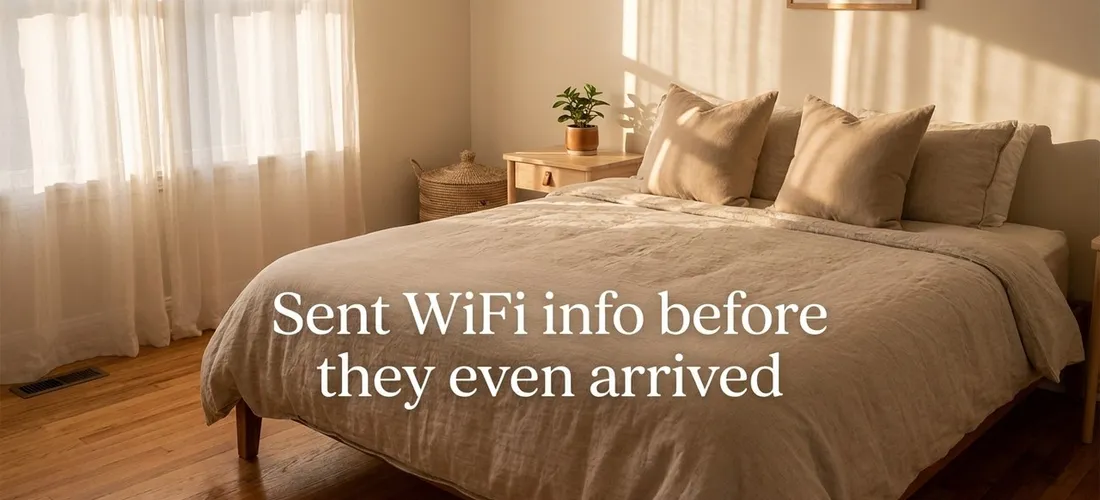
Your listing photos are doing the selling before a guest reads a single word of your description. Airbnb’s own data shows that guests decide in seconds whether to click on a listing or keep scrolling. That decision is almost entirely visual. After three years of hosting and earning Guest Favorite status on both of my Long Beach units, I’ve learned that the gap between a listing that books consistently and one that sits empty often comes down to how the photos look, not how nice the space actually is.
The good news: you do not need to spend $500 on a professional photographer to take listing photos that convert. You need the right approach.
Key Takeaways
- Your cover photo is the single highest-leverage thing you can change right now
- Natural light makes or breaks a photo; shoot mid-morning with all lights on and blinds open
- Photo order matters as much as photo quality; guide guests through a story
- Photograph every room, every amenity, and the neighborhood
- A wide-angle lens attachment for your smartphone ($25 to $40) closes most of the gap between phone and DSLR shots
Your Cover Photo Does All the Heavy Lifting
On Airbnb search results, guests see one photo. Just one. That cover photo determines whether they click your listing at all. Most hosts choose the living room or the front exterior. Both are safe choices, but “safe” is not the goal.
Choose the photo that shows the biggest visual payoff of your space. For me, that meant leading with the bedroom in my main unit because the natural light and linen bedding photograph beautifully. In my studio, the cover shot is the cozy reading nook by the window because it communicates the exact vibe solo travelers are searching for.
A few rules for your cover photo specifically:
- It must be landscape orientation (horizontal). Airbnb crops vertical photos aggressively in search results.
- Shoot it during golden hour or mid-morning when the light is soft and warm.
- No clutter, no visible cords, no personal items. The space should look like a magazine spread.
- Leave some breathing room. Photos where furniture fills every pixel feel cramped, even in large spaces.
If you are unsure which photo converts best, test it. Swap your cover photo, watch your click-through rate over two or three weeks, then decide. Airbnb’s host dashboard shows you impressions versus views, which tells you exactly how well your cover photo is pulling people in.
How to Set Up a Room Before You Shoot
The single biggest mistake I see in listing photos is shooting a room before it is properly staged. Staging for photography is different from how you normally set up a room for guests.
Here is my pre-shoot checklist for each room:
Bedroom: Make the bed with crisp, wrinkle-free linens. Add two or three accent pillows. Put a small plant or a single decorative object on the nightstand. Remove everything else from surfaces. Open blinds fully.
Bathroom: Hang fresh, evenly folded towels. Remove all personal care products, soap scum, and any items on the toilet tank. Add a small plant or a candle if you have one. Put out a single decorative soap.
Kitchen: Clear the counters completely except for one or two styled props: a fruit bowl, a French press, a small cookbook. Make sure the sink is empty and dry.
Living room: Straighten pillows, remove TV remotes and cords from view, open curtains. Add a throw blanket draped naturally over the arm of a couch.
The goal is to communicate clean, calm, and intentional. Guests are not just looking at your space; they are imagining themselves in it. That mental image needs to feel easy and pleasant.
The Photo Order That Converts Browsers to Bookers
Photo quality matters, but the order you put your photos in matters just as much. Think of your photo gallery as a tour. You are walking a guest through your space the same way you would walk them through it in person.
A high-converting photo order looks like this:
- Cover photo (your best, highest-visual-impact shot)
- Living area (full-room wide shot showing the overall space)
- Bedroom or sleeping area (neatly made, beautifully lit)
- Kitchen (staged and clean)
- Bathroom (towels folded, spotless)
- Key amenities (workspace, outdoor area, pool, hot tub, or whatever sets you apart)
- Detail shots (coffee station, welcome basket, nice linens close-up)
- Neighborhood or exterior (street, beach proximity, nearby restaurants)
Notice that the neighborhood photos go last. Most guests book based on the space, then confirm based on the location. Putting your exterior shot first wastes prime real estate in your gallery.
One thing most guides skip: use Airbnb’s photo caption feature. Add a short, specific caption to every photo. “Bedroom with blackout curtains and USB charging on both nightstands” tells a guest something they cannot see in the photo itself. Captions also help set accurate expectations, which means fewer “it was smaller than I thought” complaints in reviews. Pair your photo strategy with a strong amenities list to reinforce everything guests can see in the images.
What to Photograph Beyond the Bedroom
Most hosts stop photographing once they have covered the main rooms. That is a mistake. Every single thing that might influence a guest’s decision to book should appear in your gallery.
Photos that are often overlooked but that guests specifically look for:
- The workspace. A clear desk or table with good lighting. Business travelers and remote workers filter for this specifically.
- Parking. If you have a driveway or a dedicated parking spot, photograph it. Guests in urban areas consider parking a serious amenity.
- The check-in area. A smart lock or a key lockbox photographed clearly tells guests the arrival process will be smooth before they even ask.
- Outdoor spaces. Even a small patio or balcony photographs well and adds perceived value.
- The neighborhood. A 10-minute walk to the beach or a walkable strip of coffee shops and restaurants is a selling point. Show it.
For my Long Beach properties, I include photos of Alamitos Beach (one mile away) and the Belmont Shore dining strip. These shots bring the location to life in a way that a written description cannot.
When to Hire a Professional vs Shoot It Yourself
Professional real estate photography typically runs $150 to $400 depending on your market. That investment can pay for itself quickly if it lifts your occupancy rate even a few percentage points. But it is not the right move for every host at every stage.
Hire a professional if:
- Your listing has been live for more than two months with low click-through rates
- You have a large property with multiple rooms to capture
- Your space has unusual architecture or a standout design feature that average smartphone shots are not doing justice
Do it yourself if:
- You are just starting out and want to get a listing live quickly
- You are willing to invest in a wide-angle lens attachment for your phone ($25 to $40 on Amazon)
- Your space is small and well-lit
If you shoot it yourself, use Lightroom Mobile (free) for editing. The basic edits you need: bump the exposure slightly, increase whites, reduce shadows, and pull the warmth toward the golden-yellow side. Do not over-edit. The photos should look like your space on its best day, not like a different space entirely. Guests who show up and find the reality does not match the photos leave worse reviews, even if the space is objectively nice.
One more tip: update your photos at least once a year. If you have added new furniture, new decor, or made any improvements, the current photos should reflect that. A guest who books based on outdated photos and finds a different space loses trust before the stay even starts.
Putting It All Together
Great Airbnb photos are not about having the fanciest equipment or the most beautifully designed space. They are about showing what you have in the clearest, most compelling way possible. Stage thoughtfully, shoot in good light, order your gallery like a guided tour, and caption everything.
If you have the Welcome Book template mentioned in your listing or your guidebook already covers your amenities and check-in process in detail, your photos just need to make guests feel the place. The Complete Airbnb Guidebook Canva template can help you build out the written side of your listing so your photos and your text reinforce the same story. Together, they give guests everything they need to book with confidence.
The hosts who fill their calendars are not necessarily the ones with the best spaces. They are the ones who do the work to present their spaces well. Photos are the fastest, highest-impact place to start.